
In a world where fast fashion dominates the retail landscape, our beloved garments often find themselves abandoned at the back of the closet at the first sign of wear and tear. Yet,what if the key to extending the life of our favorite pieces lies not in the store,but in our own hands? Enter the art of DIY clothing repair—a rewarding practice that not only breathes new life into well-loved items but also promotes sustainability and creativity. As we explore the techniques and benefits of mending and upcycling, we invite you to rediscover the joy of transforming the old into something cherished anew. Whether it’s stitching a stray seam or adding a unique patch, each repair becomes a testament to our individual style and a step towards a more sustainable wardrobe. Join us on this journey to celebrate the stories behind our clothes and learn how a few simple repairs can make a world of difference.
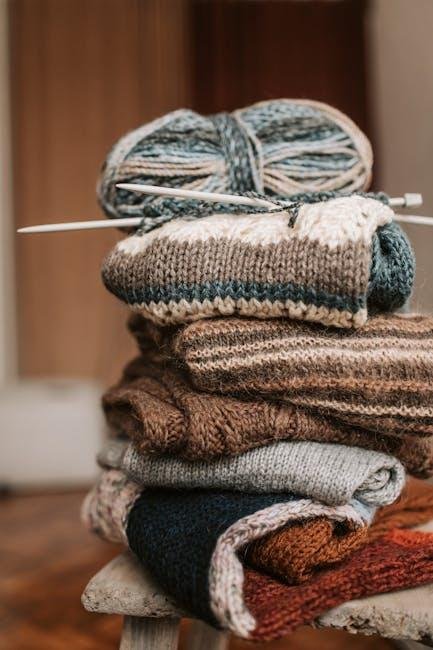
Reviving Worn Fabric: Techniques for Seam Restoration
When it comes to rejuvenating your favorite garments, a few simple techniques can work wonders for worn fabric, especially at the seams. Reinforcing frayed areas with fabric patches not only adds a touch of unique flair but also strengthens the integrity of the fabric. Consider using contrasting fabrics to create a stylish accent. Another effective technique is braiding or weaving threads from the same or a complementary fabric through the seams to add texture and visual interest, while concurrently fortifying the weak spots.
For those who prefer a more subtle approach, invisible mending offers a seamless solution. This technique involves carefully stitching the torn areas with fine, matching thread to create an almost undetectable repair. If you’re dealing with heavy-duty fabric, like denim, consider employing topstitching, which adds a decorative yet functional element to the repair. Below is a simple chart illustrating these techniques along with their benefits:
| technique | Benefits |
|---|---|
| Fabric Patching | creative flair, strengthens fabric |
| Braiding Threads | Adds texture, reinforces seams |
| Invisible Mending | Seamless, undetectable repair |
| Topstitching | Decorative and functional for heavy fabrics |

Mending Techniques for Different Materials
When it comes to repairing your beloved clothing items, understanding the different techniques suitable for various materials can make all the difference. For cotton garments, a simple running stitch or a zigzag stitch works wonders to close up small tears and prevent further fraying. If your cotton piece features a more notable damage area, consider using a patch that complements the original design. Denim, on the other hand, frequently enough requires a sturdier approach; try the visible mending technique, where you use contrasting thread and bold patches to create a stylish statement. For delicate fabrics like silk, opt for a more subtle approach—use a slip stitch to secure loose seams or fallen hems without compromising the fabric’s fluidity.
Next, let’s explore some versatile techniques for additional fabric types:
| Material | Repair Technique | Tips |
|---|---|---|
| Wool | Felting | Use a small piece of matching wool to felt over holes. |
| Leather | Leather Glue & Patch | choose a patch that matches the texture. |
| Synthetic Fabrics | Iron-on Patches | Ensure the iron is set to a low heat to prevent melting. |
Exploring these techniques not only enhances your sewing skills but also opens the door to a more sustainable wardrobe. Each method serves as a form of creative expression, allowing you to personalize your items while giving them a new lease on life.

fashion Fixes: Creative approaches to Repairing Clothing
Revamping damaged clothing is not only eco-friendly but also an possibility to showcase your creativity. Start by assessing the damage; minor rips and tears can often be repaired with simple stitches or patches.consider using scraps from other garments to create your own unique patches. the combination of different textures and patterns can give your clothes a fresh, personalized touch. You might even try adding a fun design with fabric paint or embroidery, instantly transforming a plain piece into a wearable work of art.
For more significant repairs, think outside the box. Darn holes in your favorite sweater using colorful threads to not only mend them but to make the patchwork a statement piece. If buttons are missing, replace them with mismatched ones that add a quirky flair. Don’t shy away from upcycling – turn an old pair of jeans into a trendy tote bag,or cut a long skirt into a chic crop top. Below are some quick ideas on what to do with specific types of damage:
| Damage Type | Creative Repair Ideas |
|---|---|
| Holes | Use embroidery to create floral designs or fun patterns. |
| Rips | Apply fabric patches or use the “faux patch” technique with heat transfer vinyl. |
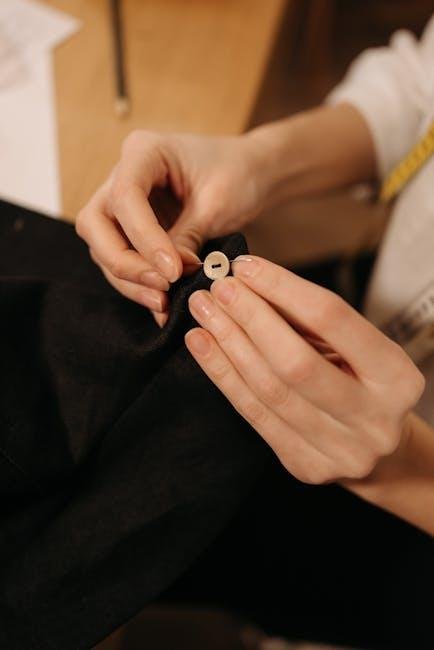
| Missing Buttons | Mix and match different buttons or create a button cluster for a stylish look. |
| Stains | Cover stains with fabric appliqués or dye the whole item for a new color. |
Essential Tools for the DIY Clothing repair Enthusiast
To dive into the world of DIY clothing repair, having the right tools is crucial for both efficiency and quality results. Begin with a good pair of scissors—sharp, fabric-specific scissors will make cutting threads and fabric much easier and cleaner. Pair these with a seam ripper for removing unwanted seams, buttons, or stitches without damaging your fabric. Don’t forget about pins and clips to secure fabric pieces together while you sew; this ensures a precise finish. Consider investing in a measuring tape for accurate measurements, as well as tailor’s chalk or fabric markers for marking your fabric without leaving permanent traces.
Another essential is a high-quality sewing machine that suits your skill level, but if your not ready for that leap, hand-sewing needles and a good selection of thread in various colors will certainly do the trick. For more intricate repairs,a patch kit comes in handy,including patches of various materials for creative repairs.It’s also wise to have a repair guidebook nearby for quick tips and techniques.Check out the handy table below for a quick reference to must-have tools and their uses:
| Tool | Purpose |
|---|---|
| Scissors | Cutting fabric and threads |
| Seam Ripper | Removing seams and stitches |
| Measuring Tape | Getting precise measurements |
| Pins and Clips | Holding fabric in place |
| Thread | For sewing and repairs |
Concluding Remarks
As we conclude our journey through the world of DIY clothing repair, it’s clear that the art of mending is not just about patching up holes or sewing on buttons; it’s a party of sustainability, creativity, and personal expression. By taking the time to repair and rejuvenate your favorite garments, you honor the stories woven into their fabric and contribute to a more mindful approach to fashion. Armed with just a few basic tools and a sprinkle of creativity, you can transform the way you interact with your wardrobe—turning wear and tear into moments of joy and self-discovery. So, whether you’re wielding a needle and thread for the first time or perfecting your patching technique, remember that each stitch you take is a step toward extending the life of your cherished pieces.Embrace the possibility of giving old items new life, and let your clothing continue to tell its story, one repair at a time.
